要遠端使用Windows10連線操控 Ubuntu 20.04 或 Debian 10 不在是困難的事情了!
今天總教頭就來交一個密技:
在Ubuntu 20.04 和 Debian 10上安裝 NoMachine 遠程桌面工具(遠端使用Windows10連線操控)
NoMachine 是一個遠程桌面工具,它跟 TeamViewer, AnyDesk, RealVNC… 等軟體類似!
NoMachine是一個遠端桌面管理工具,使您可以訪問本地網路上的電腦。
這也可以是通過公共網際網路安全訪問的辦公室或家用電腦。
NoMachine 是個可讓你用你手邊的電腦、平板或手機透過網路來遠端登入、遙控家裡或公司電腦的工具,其實不只遠端操作電腦
(NoMachine 遠端登入、遙控電腦 支援:Windows.Mac.iPhone.Android)….經過測試後,我覺得:真的太厲害了!太好用了!
就算你要遠端看日劇韓劇、遠端聽家裡的音樂,或利用公司的印表機來遠端列印、遠端掃描…也都可以(網速不能太慢就是了)
透過 NoMachine 軟體的遠近搭配,讓我們出門在外就像在家裡或辦公室的電腦桌前面操作一樣,簡單方便。
您若平時是使用:Windows.Mac做為作業系統,並且是使用Linux來架設Apache Web Server .使用PHP程式與MySQL Database (或 MariaDB )資料庫
那萬一要遠端操控Linux主機,那可能嗎?答案是:可以的!
首先,我們必須要在Linux主機(Ubuntu 20 或 Debian 10)上,安裝NoMachine 遠程桌面工具
其方法如下:
NoMachine遠端桌面工具可作為.deb軟體包用於Ubuntu和其他基於Debian的Linux發行版。
訪問下載頁面以取得您電腦的版本。我將使用wget指令下載:
sudo apt update
sudo apt -y install wget
wget https://download.nomachine.com/download/6.9/Linux/nomachine_6.9.2_1_amd64.deb
下載文件後,使用apt或dpkg命令安裝它:
sudo apt install ./nomachine_6.9.2_1_amd64.deb這是我安裝的輸出:
Reading package lists... Done
Building dependency tree
Reading state information... Done
Note, selecting 'nomachine' instead of './nomachine_6.9.2_1_amd64.deb'
The following NEW packages will be installed:
  nomachine
0 upgraded, 1 newly installed, 0 to remove and 597 not upgraded.
Need to get 0 B/46.8 MB of archives.
After this operation, 192 MB of additional disk space will be used.
Get:1 /root/Downloads/nomachine_6.9.2_1_amd64.deb nomachine amd64 6.9.2-1 [46.8 MB]
Selecting previously unselected package nomachine.
(Reading database ... 276093 files and directories currently installed.)
Preparing to unpack .../nomachine_6.9.2_1_amd64.deb ...
Unpacking nomachine (6.9.2-1) ...
Setting up nomachine (6.9.2-1) ...
NX> 700 Starting install at: Sun Jan 26 17:14:12 2020.
NX> 700 Installing: nxclient version: 6.9.2.
NX> 700 Using installation profile: Debian.
NX> 700 Install log is: /usr/NX/var/log/nxinstall.log.
NX> 700 Compiling the USB module.
NX> 700 Installing: nxplayer version: 6.9.2.
NX> 700 Using installation profile: Debian.
NX> 700 Install log is: /usr/NX/var/log/nxinstall.log.
NX> 700 To connect the remote printer to the local desktop,
NX> 700 the user account must be a member of the CUPS System Group..
NX> 700 Player install completed with warnings.
NX> 700 Please review the install log for details.
NX> 700 Installing: nxnode version: 6.9.2.
NX> 700 Using installation profile: Debian.
NX> 700 Install log is: /usr/NX/var/log/nxinstall.log.
NX> 700 Creating configuration in: /usr/NX/etc/node.cfg.
NX> 700 Displaying file: /usr/NX/share/documents/node/cups-info

  CUPS Printing Backend

  The  NoMachine Node  setup procedure could not detect your
  CUPS installation: either  CUPS  is not installed on  your
  system or it was installed in a non-standard path. CUPS is
  needed  in order to  enable  printing  support  in your NX
  system.
  Please note that you can enable  printing support for your
  NX system at any time; to do this make sure  that you have
  CUPS installed then run:

    /usr/NX/scripts/setup/nxnode --printingsetup <pathname>

  to specify the location of the CUPS root path.

NX> 700 Node install completed with warnings.
NX> 700 Please review the install log for details.
NX> 700 Installing: nxserver version: 6.9.2.
NX> 700 Using installation profile: Debian.
NX> 700 Install log is: /usr/NX/var/log/nxinstall.log.
NX> 700 Creating configuration in: /usr/NX/etc/server.cfg.
NX> 700 Install completed at: Sun Jan 26 17:14:31 2020.
NX> 700 NoMachine was configured to run the following services:
NX> 700 NX service on port: 4000
接著下來,我們就可使用NoMachine遠程桌面工具
使用桌面應用程序啟動器啟動NoMachine遠程桌面管理工具:
下載網址:
https://www.nomachine.com/download/download&id=16
在windows 10 作業系統下安裝它!
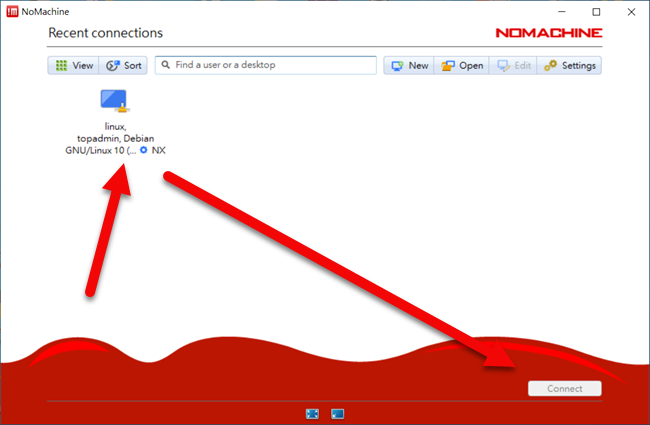
安裝完成之後,開啟他就可以使用NoMachine遠程桌面管理工具來連線:
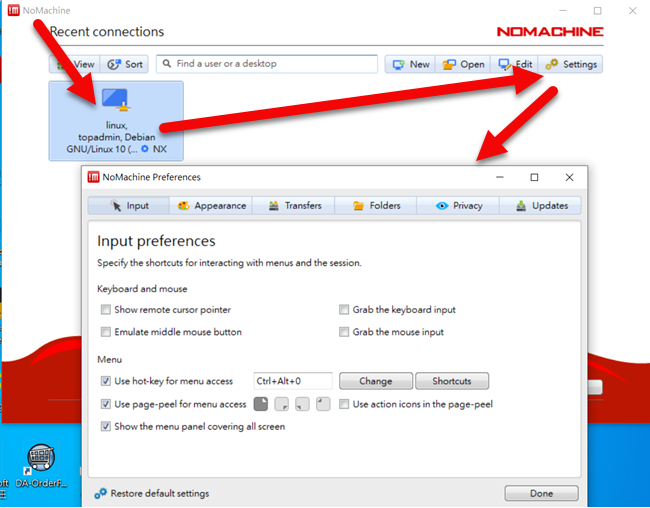
當然我們也可以做一些設定:
這些步驟都非常容易上手:
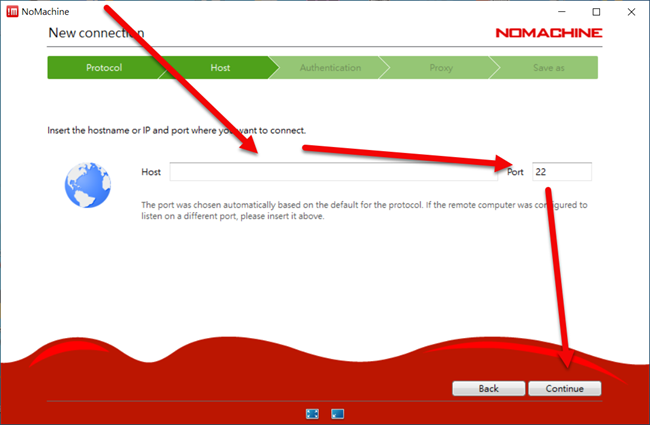
很容易設定!完成之後就可以順利連線:
只要輸入正確的 IP 位址即可連線。
登入時的帳號密碼跟登入 Windows 桌面的密碼一樣
所以如果要讓其他人連線進來也可以在 Windows 設定裡面另外新增一個帳號給 NoMachine 連線使用。
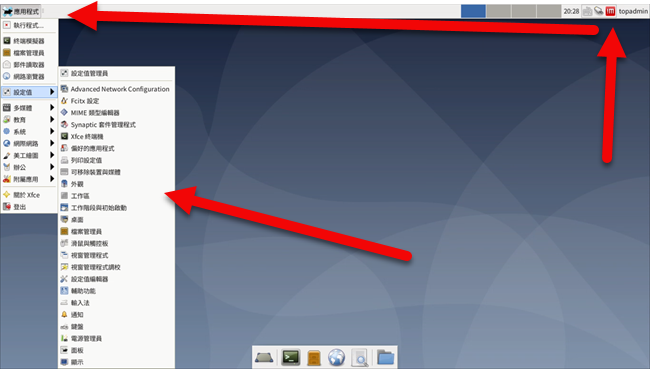
如此一來,日後我們就無須因為要登入Linux主機而大費周章了!
不需要將Linux主機接上螢幕.滑鼠.鍵盤….一大堆麻煩的事情!
只要在Windows 或MAC作業系統端,連線.登入.操控即可!
這是不是非常跨時代的好方法呢?答案是:肯定的!


